Wishing you a safe and joyful Thanksgiving,
SERVPRO Team Spinner
(908) 233-7070
As the Thanksgiving holiday approaches, the aroma of delicious meals and the warmth of family gatherings fill the air. At SERVPRO Team Spinner, we want to ensure that your Thanksgiving is not only filled with gratitude and joy but also with safety and preparedness. Here are some essential tips to keep your celebrations accident-free:
1. Fire Safety Precautions: Thanksgiving often involves a lot of cooking, and safety in the kitchen is paramount. Double-check your smoke detectors to ensure they are working correctly. Avoid kitchen distractions, and never leave the stove or oven unattended. If deep-frying a turkey, do it outdoors, away from structures, and keep a fire extinguisher handy.
2. Deep-Frying Safety: For those opting for the crispy delight of a deep-fried turkey, take extra precautions. Thaw the turkey completely, pat it dry, and ensure the fryer is on a flat surface. Keep the fryer a safe distance away from your home, and never leave it unattended. Also, be cautious of the oil temperature to prevent spills and flare-ups.
3. Mindful Disposal of Cooking Byproducts: Avoid clogged drains by being mindful of what goes down the sink. Dispose of cooking grease in a designated container rather than pouring it down the drain, as it can solidify and cause blockages. Use strainers in sinks to catch food scraps and prevent plumbing issues.
4. Emergency Preparedness Kit: In the spirit of preparedness, have an emergency kit ready. Include essential contacts, insurance information, and any necessary medications. Having these items readily available ensures a swift response in case of unforeseen circumstances.
5. Home Security Measures: If you plan on traveling for the holiday, take steps to secure your home. Lock all doors and windows, set alarms if available, and consider asking a trusted neighbor to keep an eye on your property. A secure home allows you to enjoy your Thanksgiving without worry.
Thanksgiving is a time for joy, reflection, and connection. By incorporating these safety tips into your holiday preparations, you can ensure a celebration that is not only memorable but also safe for everyone involved. From all of us at SERVPRO Team Spinner, have a happy and secure Thanksgiving!
The truth is, there is no one-size-fits-all approach to home insulation. All homes are created differently. There are a few factors to consider when choosing the right insulation for your home including climate, installation, cost, and product performance. It is also important to consider a product’s thermal performance rating. This is known as the R-value.
Fiberglass- This is by the far the most commonly used insulation. It usually comes in rolls pre-sized to fit between standard joists and studs. Fiberglass has been the go-to choice for new construction for both DIY homeowners and professionals. Not to mentioned it is relatively affordable.
Mineral Wool- This is a definite DIY installation as this tends to hold shape well. It is composed of recycled materials and has fire-retardant properties. Mineral wool is also known as rock wool or slag wool.
Loose Fill- For filling nooks and crannies in your attics, your best bet may be to use a loose-fill insulation. This is composed of fiberglass or cellulose. This product is blown into place with a special machine and does a great job of filling gaps. On the down side, there have been some reports that it can compress overtime, losing effectiveness. Also, keep in mind that for some attics or roof structures, cellulose may be too heavy.
Spray Foam- This formula offers a high R-value and can fit in just about any tight space when it dries hard, providing a cozy home. This option of insulation is a bit more expensive than other types and does require the help of professionals, but it can cut down on other weatherizing tasks, such as caulking.
Rigid Foam- These rigid foam panels are commonly made of polystyrene, polyisocyanurate, or polyurethane. It helps slow heat transfer through structural elements like studs. It is more expensive than batt and blanket insulation, and hard to fit into awkward corners.
Structural Insulated Panels(SIPs)- These panels are airtight structural elements that help with noise reduction and can provide energy savings up to 14%. They can be installed in walls, ceilings and floors. They are on the pricier side and are used mostly for new construction.
Radiant Barriers and Reflective Systems- This type of insulation system has highly reflective materials which helps reflect heat away from the house. They are installed on the underside of a roof and reduce radiant heat transfer from the sun, reducing cooling costs for your home.
Today, more than 90% of homes and nearly all business use air conditioning to beat the summer heat. Most people think they know how to maintain their system properly, whether it’s central air, a window unit, or ductless mini-splits. Many homeowners fall victim to common mistakes that waste energy, shorten the working lifespan of their air conditioner, and cost money.
Buying the wrong system- Try to use an air conditioner that’s correctly sized for your home. An oversized unit may cycle on and off too quickly. This will result in ineffectively removing humidity and will not maintain uniform temperatures. On the other hand, a too-small unit will need to run constantly, which will ultimately shorten the lifespan drastically. Consideration each room’s square footage, layout, insulation and function.
Cooling an empty room- Upgrade to a programmable thermostat to avoid wasting both money and energy on cooling an empty house. This technology allows you to raise and lower the temperature of your AC based on preset schedule. This can save you hundreds of dollars annually. Do you have unoccupied rooms? Boost your energy efficiency by closing vents in those rooms as well as keeping closet and cabinet door shut so excess air doesn’t get in.
Putting the AC unit in direct sunlight- We all know air conditioners aren’t the most attractive items in a landscape, but homeowners shouldn’t try to “hide” the unit in an inopportune spot. The location of an air conditioner has a great impact on its energy efficiency. Try installing it in a shady spot. Too much direct sunlight will make the system work harder. Also, do not place plants or shrubs too close to the unit, as these will impede ventilation causing the condenser coils to clog.
Poorly positioning the thermostat and vents- Thermostats should be properly positioned for accuracy reasons. Placing the thermostat in direct sunlight or near heat-producing lights gives an inaccurate reading, causing the air conditioner to work overtime. Also, make sure not to block vents with furniture or curtains as this will inhibit proper air circulation.
Setting the thermostat too low- Homeowners have a bad habit of setting their thermostat much lower than needed. Adjusting to a higher setting will cut your AC cost around 3% for every degree you raise the temperature.
Not cleaning the coils- Out door condensers and evaporator coils should always be well maintained. Condensers and coils can clog up with dirt, which blocks airflow and insulates the coils, reducing their ability to manage heat efficiently. Try not to place your AC components near dryer vents. Remove fallen leaves, grass clippings, and other debris to prevent clogging.
Homeowners often wonder how to identify the different signs of foundation problems. It certainly tops the list of potentially expensive home repairs, and for good reason. The average cost of foundation repairs can be between $5,000 and $7,000 and can potentially climb even higher if the problems damage other parts of your home. Identifying foundation problems early is an important part of preventative home maintenance.
Finding cracks in walls, floors and ceilings is crucial when assessing potential foundation damage. But just because you can’t see a crack doesn’t mean one isn’t there – or that it isn’t coming. Paranoid yet? Time to put your mind at ease. Here are a few ways to check your home for signs of foundation problems.
Test door and windows- If you are noticing a few of your windows and doors getting tougher to close, it could be a sign of foundation problems. Shifting in an unstable foundation can distort the shape of the frames, making the doors and windows unable to latch and eventually jam entirely.
Saggy Floors and Ceilings- Warped floors and ceilings and be a warning sign of foundation problems. As the foundation moves, it can pull apart or compact walls and support beams. This can cause the weight of the house to sit unevenly in certain spots. An indicating sign is a slanted floor. If you notice a continual change in one direction, it may be time to call a professional.
Inspect Sources of mold- Reappearing mold in the corners of windows and walls and means that’s moisture is accumulating in your home. Check mold-prone areas to rule out any foundation-related cracks and gaps that could be letting in water.
Check gaps between exterior windows and walls- If you notice gaps between your front door and façade, it could mean that the foundation of your home is shifting, causing the two to pull apart. These gaps can allow water and insects like termites into the walls of your home, resulting in even more structural damage in the long run.
Pay close mind to your chimney- If your chimney shifts dramatically, it can collapse entirely, posing a serious threat to your family and your property.
Investigate cracked walls or floors- The easiest signs of foundation problems are cracks in the walls and floors of your home. Not all cracks are related to foundation issues. Small cracks near a window or door frame can typically be caused by normal seasonal expansion of the drywall and underlying wood. Do be alarmed when you see cracks that are more than one-eighth of an inch wide. Cracks that are wide on one end and narrow on the other, horizontal or at a 45-degree angle, leaking water, or stair step cracks on walls can be a sign of foundation problems.
Reference: Schroer, Emily (2018, May 17). 9 Ways to Spot Serious Home Foundation Problems
Try to imagine the world we live in without air conditioning and how uncomfortable it would be!
It was 116 years ago today, July 17, 1902 that the air conditioner was invented. Willis Carrier was an engineer, working to invent a machine that would control air temperature and humidity for a printing plant in Brooklyn, New York. His mission was to somehow create something that would keep the paper from shrinking, wrinkling, etc in the summer heat. What he wound up inventing was the first mechanical, electrical air conditioner and it would prove to be one of the world's most revolutionary inventions to date.
Thank you, Willis Carrier for inventing the Air Conditioner and for the enormous impact it continues to have on all of our daily lives!
Candles, music, and tub filled with bubbles may be just what you need after a long day. But, with all that plumbing, humidity, and other business going on in there, your bathroom is full of unexpected hazards.
Soap Scum- Neglecting your tub is not only unsightly - that slimy buildup can lead to slips and falls while bathing or getting in and out of the tub. Aside from keeping your tub clean or shower floor clean, consider adding non-slip strips to the floor or installing grab bars to decrease the risk of injury.
Mold- Mold can grow often in the grout between tiles or along caulk lines due to an influx of humidity. Prevent the buildup with proper ventilation, including dehumidifiers, fans, and open windows.
Air Fresheners- Some sprays contain VOCs and cancer-causing chemicals such as benzene and formaldehyde. Try opting for a fan or opening a window instead of covering any unpleasant scents.
Cleaning Products- Although we are tempted to use the strongest cleanser we can find, some commercial cleaners contain chemicals that can irritate the eyes and skin or emit dangerous fumes. Instead, look for cleansers certified as the Safer Choice by the EPA.
Hairballs- Overtime, all the hair, products, and dirt you wash down the sink can clog up the pipes. A clog can lead to an overflow in the sink or tub that causes water damage through the rest of the room. To prevent it, run a snake through the pipes anytime the draining starts to slow.
Anti-bacterial Soap- Many soaps marketed as antibacterial contain additives like triclosan and triclocarban, which have been linked to afflictions from allergies to hormone disruption. Plus, they don’t actually get your hands any cleaner than vigorous washing with regular soap and water.
Care for some cleaning tips? SERVPRO of Central Union County are here to give you a friendly reminder to clean these unexpected Spots around the house
Dust off your ceiling fan’s blades with a pillow case to prevent dust from flying all over the air. Start by sliding an old pillow case over the blade, then slowly slide it off, maintaining light pressure against the blade. Any dust will fall right into the case instead of all over the floor and air.
Do you gag every time you take out the trash to the garbage can? Sure, you may say that it will just get smelly all over again, but there's a tolerable level of stench that you can maintain if you just spray it down with a hose and a sprayer attachment. It should be strong enough to push all of that built-on grime.
Make a DIY spray for your outdoor furniture. Mix half a cup of vinegar, a cup of club soda, a cup of dish soap, and 15 drops of essential oil in a spray bottle. Spray all over the furniture and scrub with a bristle brush. Wipe off with a microfiber towel. Good like new!
Need outdoor cushions cleaned too? Scrub the cushions with a solution of a quart of warm water, a teaspoon of dishwashing detergent, and a tablespoon of Borax. Let cushions soak for 15 minutes, then rinse them with a hose. Stand them on their sides in the sun to dry.
I’m sure that dirt and pollen left behind on your windows doesn’t look very attractive. Rub warm soapy water all over the windows with the squeegee, then remove the cover to pull the squeegee across the window from top to bottom. Dry off the rubber blade after every pass and only move in one direction so you aren't pushing the dirt around.
Want to learn a neat trick for dusty window screens? You can vacuum the screens from the inside by putting the brush head on your vacuum and gently brushing the screen. No need to take them out of the window!
Rusty gardening tools? Spray your gardening tools with vinegar and wrap them in paper towels. Set them off to the side for 2 hours. Use a toothbrush to scrub off the rust, and rinse and dry the tools. Sprinkle baking soda all over the tools and splash water on them for a follow-up scrub. You can store them afterward in oiled sand to keep them lubricated
We at SERVPRO of Central Union County understand the inconveniences homeowners deal with in their home, whether there is a sudden burst pipe, or a flood in the basement. Here are some emergency guidelines to consider to better prepare yourself for any future common household mishaps.
Animal Invasion
As homeowners, we are not too fond of uninvited guests. Animals can find their way inside your home causing major chaos. Urine, feces, ripped upholstery, you name it. These creatures sure do know how to leave a mark! No pun intended. Try closing all doors and containing it in one area. Open a window so it can find its way outside. Call animal control if this does not work.
Burst Pipes
In a matter of seconds, a burst pipe can cause a substantial amount of damage. If water is gushing out, try closing the valve closest to the link, then shut off the main water valve into the house. We at SERVPRO of Central Union County are staffed with experienced technicians able to help with any clean up, extraction of water, or drying needed.
Black Out
Although it seems like an unharmful inconvenience, power outages still pose dangers and safety precautions should be taken. Disconnect all appliances and electronics to avoid damage from power surges when the power returns to your home. Be careful when using candles, and make sure to stock up on flashlights and extra batteries.
Gas Leak
If you notice a gas odor in your home or your carbon monoxide sounds, evacuate as quickly as possible. Once relocated to a safer area, call your gas company and ask them to send you a technician to check for any leaks.
Any carpet that experiences regular use will need to be replace sooner or later. Carpets usually have 5-15-year life span. Consider the following to determine if your carpet is due for a replacement.
Stains on your carpet? Although most carpets come with a stain resistance finish, the treatment fades away over time and leaves the carpet unprotected. If you find yourself covering stains with furniture or rugs, it may be time for a carpet replacement. Fortunately, professionals like SERVPRO of Central Union County have the skills to remove tough stains.
Certain stains such as pet urine or vomit are easily clean but bacteria from such can absorb into the carpet padding, eventually creating mold. Please consider replacing the carpet due to health hazards.
Experiencing bad odor? When owning a pet or you haven’t cleaned in a while, you will notice a persisting smell on your carpet. Usually with some proper cleaning, the smell will subside. If it doesn’t, typically the odors have penetrated deep into the carpet padding or subfloor.
If you notice that your allergies have increased, one source may be your older carpet. Often, older carpets retain allergens which can cause your allergies to act up.
How old is your carpet? color loss, fading, matting, ripples, wrinkles and lack of padding support can be a clear indication that your carpet has reached its end.
Those high temperatures summer brings can surely rack up high electrical bills. Here are some tips to keeping cool and save energy: • Air leaks is very common in homes. Make sure to seal up windows, doors, and other parts of your home in which cool air can sneak out of. • Look for products with the Energy Star label. Air conditioners with the Energy Star label usually use 15% less energy than conventional models. That means more money in your pocket. • Make sure to clean and maintain air conditioners. Have your filters cleaned or replaced. This helps so your air conditioner uses less energy to operate. • Unplug any appliances when not in use or when leaving your house. To make this hassle free, plug in appliances or home electronics on a power strip and turn off the power strip when not in use. • Close blinds, shades, or curtains to keep your home cool and the hot sun rays out. • Wash your clothes in cold water. Skip the dryer and take it old school with a traditional clothes line. We hope these simple tricks will help you out this summer!
SERVPRO of Central Union County is certified as a Small Business by the US Small Business Administration (SBA), and by the State of New Jersey and the Port Authority of New York/New Jersey as a Small Business Enterprise
Things Your Parents Didn't Tell You About Taking Care of Your Home: Winterizing Your Home
Ice dams are a common homeowner’s nightmare in the winter whenever it snows, potentially causing major and costly water damage to your roof and even ceilings. Ice dams occur when snow on the roof melts slightly then refreezes when the runoff reaches the eaves, often in the gutters. When the day warms even slightly, the top layer melts but is unable to drain off properly, resulting in a pool of water up against the base of your roof. The water then often seeps under the roofing material, sometimes as much as 5ft or even 10ft up. Eventually, the water can work its way into your house’s soffits, walls, and even ceilings. When it comes to ice dams, an ounce of prevention is worth far more than a pound of cure.
Essential Maintenance
Thoroughly clean out your gutters and downspout after the last leaves have fallen in your neighborhood, but certainly before the first snows of the season. Water will run more swiftly through cleaned gutters, giving it less time to freeze. Empty gutters also allow more room for ice and water to pool before it starts threatening your roof.
Try to purchase a roof rake or snow rake (a type of rake specially designed for cleaning your roof of snow) before the first snow of the season, then scrape the snow off your roof after each snowfall, or pay someone to come out and scrape the snow for you. This can also help avoid problems with the snow falling suddenly and possibly hitting someone when it comes loose as it melts. Unfortunately, snow rakes only work for single-story homes – they’re not long enough to reach a second floor, and you should never use a roof rake while standing on a ladder. Snow rakes work well if you experience heavy snows only rarely, but can be tedious to use.You will also need to be careful to not damage shingles since they can become brittle in the cold. Specially designed roof rakes are available for clearing snow off solar panels – standard roof rakes should not be used on panels as they can scratch the photorefractive surface.
If nothing else works, heat cables can help prevent ice dams as a fallback measure, especially if installed in the gutters and the downspout. Heat cables run over portions of the roof in a zigzag pattern, melting away ice and snow when turned on and can help if installed on a part of your roof particularly prone to ice dams. They might not prevent ice dams entirely, but heat cables can create enough of a channel for water to drain away, preventing some water damage.
Next time you need to replace your roof, also consider adding a special ice-and-water barrier under the shingles up to 3ft to 6ft from the roof’s edge. It will help with waterproofing, and the building codes in most areas now actually require an ice-and-water barrier to be installed under your roof. Your local building inspector will know how far up the barrier needs to extend in your region.
A Colder Roof
Generally speaking, ice dams form when the surface of your roof is above freezing, but the edges of your roof are below freezing. As hot air leaks from inside your house, it warms up your roof, often just enough to bring it right to the edge of freezing, creating the conditions in which ice dams can form. Many of the methods listed here can also reduce heat leakage, lowering your heating bill.
The average U.S. home loses about one-third of its heat through the ceiling and into the attic, and from there into the outside world. Most of that loss is due to leaks between the conditioned home and unconditioned attic. Unfortunately, air leaks are a hard nut to crack, since you usually have to go into the attic, pull back insulation, and plug any leaks by hand with foam, caulk, or other methods. Leaks usually occur around anything that penetrates the ceiling, like pipes, ceiling fixtures, access hatches, and others. Sealing leaks is ideally a cold-weather project since otherwise your attic will likely be too warm.
Heat loss also occurs through inadequate insulation. How much insulation you need varies depending on where you live. Generally, blown-in cellulose and fiberglass will serve better in colder regions, since they leave fewer gaps. See our article on installing insulation for a more in-depth look at how much and what kind of attic insulation your home needs. You will also want to make sure that any insulation doesn’t block your airflow. Baffles usually prevent blocked airflow, though you will still want to check your soffit vents.
Adding attic ventilation to an unfinished attic will make the attic colder, keeping the roof from heating up. Attic ventilation can be complicated. Generally speaking, you need about 1 sq ft of vent (the actual openings, added together for total vent area) per 300 sq ft of ceiling area (the size of the attic floor), with half of the total vent area low on the roof and half high on the roof. Look at your existing vents to find the area of each (which should be stamped somewhere easily visible), then add the area of your existing vents together to find out how much you still need. Some roof styles are harder to vent than others. When in doubt, contact a qualified contractor for advice and guidance.
Also, whenever you make your home more airtight, double check your combustion appliances, including furnaces and most water heaters, for backdrafts. If your appliance isn’t drafting properly, it could be leaking deadly waste products into your home. If you suspect you might have a problem with back drafting, contact a licensed home inspector to check your house and combustion appliances.
What to Do If a Dam Forms
Sometimes even the best preventative measures can’t stop dams from forming. Try to carefully remove any forming ice from your gutters. If you have heat cables, they can also reduce the damage a building ice dam will do. The safest way to remove the ice entirely, though, is to hire a roofing company to use a steamer to remove any ice and snow. A steamer uses hot water at high pressure to melt the ice without risking the damage that an ice pick does.
Bad NJ Winter Weather Forecast Released: Polar Vortex May Return
New Jersey and Pennsylvania may be in for another polar vortex weather system that could send temperatures into the record books in late winter and early spring, forecasters say.
And you probably don’t need to be reminded of the bone-chilling nightmare that was the winter of 2013-2014, when record low temperatures extended well into March. It was cold everywhere, and on Jan. 7, 2014, the temperature in every state in the country dipped below 32 degrees, even in Hawaii, where it was 25 degrees. At least 33 deaths were blamed on the record cold.
AccuWeather meteorologist Dean DeVore said it looks like the area could get a one-two punch from a couple of polar vortices.
“If you really delve deep into it there’s actually a couple of vortices,” DeVore told reporters. “One’s in the lower level of the atmosphere, one's in the higher levels. All of that — part and partial — looks like there’s a shift in one of the polar vortices that is expected to happen going into this winter.”
Polar vortices often mean colder temperatures in February and March. Though he expects some periods of extreme cold, DeVore thinks a bigger effect on winter weather will be the change from an El Niño to a mild La Niña system, which is occurring now and is expected to result in a colder, snowier winter, a departure from the last couple of years, he told told WWJ/CBS Detroit.
The prediction would match what was already forecasted by AccuWeather, which recently released its long-range forecast that predicts it will feel like an extended winter for New Jersey and Pennsylvania as cold and snowy conditions will likely stretch into spring 2017.
Frequent storms across the northeastern U.S. — particularly in the Northeast — this winter may lead to an above-normal season for snowfall.
"I think the Northeast is going to see more than just a few, maybe several, systems in the course of the season," AccuWeather Long-Range Forecaster Paul Pastelok said in a news release.
Unlike last season, in which most of winter's snowfall came from a few heavy-hitting storms, this winter will last into the early or middle part of spring and will feature frequent snow events.
AccuWeather said much of the accumulation will be in New Jersey, the Philadelphia metropolitan area and south of Washington, D.C. These areas will see a handful of changeover systems, where falling snow transitions to rain and sleet.
The Old Farmer's Almanac, meanwhile, has released its long-range weather predictions for the rest of 2016 and into 2017. If the publication's long-range forecast is accurate, we should expect above-normal temperatures this winter in the central part of the Atlantic Corridor region, which includes New Jersey.
What is a Polar Vortex?
Though the term was only popularized in recent years, polar vortices aren’t anything new. The National Weather Service explains that a polar vortex — a large area of low pressure and cold air surrounding both of the Earth’s poles — always exists but weakens in the summers and strengthens in the winter.
“The term ‘vortex’ refers to the counter-clockwise flow of air that helps keep the colder air near the Pole,” the Weather Service explained. “Many times during winter in the northern hemisphere, the polar vortex will expand, sending cold air southward with the jet stream. This occurs fairly regularly during wintertime and is often associated with large outbreaks of Arctic air in the United States.”
Similar outbreaks of extreme cold were also reported in 1977, 1982, 1985 and 1989.
Protect Your Pipes
So, what should you do to get your home and car ready while it’s still relatively mild? Even if the polar vortex doesn’t bring brutally frigid weather, you should take some precautions because the weather will turn colder.
Make sure your plumbing pipes are protected. Pipes freeze under three common scenarios: quick temperature drops, poor insulation and thermostats that are set too low. Some suggestions from the American Red Cross, Popular Mechanics and American Home Shield:
Check the insulation of pipes in your home’s crawl spaces and the attic, because they’re the most susceptible when temperatures plummet.
Wrap pipes in heat tape or thermostatically controlled heat cables, but be sure they’re approved by an independent testing organization, such as Underwriters Laboratories Inc.
Use caulk or insulation to seal leaks that allow cold air to flow inside near plumbing pipes. Pay particular attention to leaks around electrical wiring, dryer vents and the pipes themselves.
Disconnect hoses from each spigot on the outside of your house. Drain and store them.
Use an indoor valve to shut off and drain water from pipes leading to outside faucets. This will reduce the chance the short span of pipe just inside the house will freeze.
In extreme cold, you may be able prevent your pipes from freezing by allowing a trickle of warm water to drip overnight, preferably from a faucet on an outside wall.
Leave your thermostat at the same temperature, day and night. Your routine may be to turn the heat down when you go to bed, but when the temperature plummets, which often occurs overnight, your pipes could freeze. Better to have a higher heating bill than costly repairs necessary when pipes freeze and burst.
Keep garage doors closed if there are water supply lines in the garage.
Open kitchen and bathroom cabinet doors to allow warmer air to circulate around the plumbing. Be sure to move any harmful cleaners and household chemicals up out of the reach of children.
If you will be going away during cold weather, leave the heat on in your home, set to a temperature no lower than 55 degrees Fahrenheit. Another idea is to turn off the main water valve before you leave home, even if you’re going to be gone only for a weekend.
Furnace Been Checked Lately?
With the house sealed up, you’ll also want to check these items off your list:
Make sure your furnace has been serviced to ensure it is running efficiently and safely.
Install a carbon monoxide detector and water heater, especially since they could be running on overdrive in freezing temperatures.
If you have a wood-burning fireplace, make sure the chimney is cleaned and the chimney cap is in place.
What to Do During Power Outage
You should also gather some other items you may need in the case of a power outage — and don’t forget to talk through the emergency plan with your family:
Have plenty of matches, candles and flashlights on hand in case the power goes out.
If you have a wood-burning fireplace or stove, make sure you have some cut firewood ready in case of an emergency.
A few extra gallons of water.
Non-perishable food items for you and your pets.
Lots of blankets, sleeping bags and comforters.
A battery-powered radio.
Backup battery for your cell phone and computer
A first-aid kit.
Dress for the Cold Regardless
Now, make sure your vehicle is ready to go for the cold months ahead. Here are some tips from the National Oceanic and Atmospheric Administration:
Have you located the windshield scraper and brush? Find them before you need them.
Keep your gas tank at least half full during extreme cold situation, so you can stay warm if you become stranded.
Dress for the extreme cold, even if you don’t think you’ll be out much.
Graphic courtesy of NOAACar Emergency Survival Kit Must-Haves
Put together a winter car survival kit for your vehicle. Be sure to include:
Definitely include jumper cables, but you may want to include flares or reflective triangle as well.
Flashlights and extra batteries.
First-aid kit, including necessary medications, baby formula and diapers if you have a small child.
Non-perishable food items such as canned food (don’t forget a can opener) and protein-rich foods like nuts and energy bars. If you travel with pets, make sure to include food for them, too.
Water — at least a gallon of water per person a day for at least three days.
Basic toolkit with pliers, wrench and screwdriver.
Cat litter or sand for better tire traction.
A shovel to dig out of snow.
Extra gloves, hats, sturdy boots, jacket and extra change of clothes for the cold.
Blankets or sleeping bags.
A car charger for your cellphone
Things Your Parents Didn't Tell You About Taking Care of Your Home: Winterizing Your Home
The excitement of owning your first home can be intense and overwhelming. The opportunity to make each room a reflection of you and your tastes, to fill the rooms with things that are meaningful to your family, and to become a part of your new neighborhood can quickly fill up your first few months in a new home. But after you’ve had a chance to settle in, the weather starts cooling off, and the leaves start turning beautiful colors, you realize there may be things you need to do to prepare your home for the change in seasons.
Winterizing your home is an important, but all too often overlooked, part of maintaining a household. Properly protecting your home against cold weather can help save money, increase your personal comfort, and reduce the chance of expensive problems like burst pipes. Many of these steps you will want to do before freezing weather sets in to head off any problems that the cold weather may cause. The first frost date for your area is a good approximation for the onset of cold weather, and there are several agricultural sites that allow you to look up the average first frost by zip code. Some areas of the U.S. can experience their first frost as early as September, so it’s good to know what to expect for your area.
While many of the steps here are simple and cheap, some can get costly. Luckily, the federal and state governments offer tax credits and weatherization assistance for some purchases. The US Department of Energy has a guide on seeking weatherization assistance from the state, and the Environmental Protection Agency’s Energy Star program has a guide on federal tax credits for energy-efficient purchases. Be sure to check these each year, as guidelines and eligibility requirements can change.
Before the Frost:
Executive_Home
Remove dead tree branches: Prune back any dead or damaged tree branches, especially if they overhang your house or parking space. Dead branches are more likely to break and fall in a snow or ice storm, potentially damaging your property and passerby. You should also remove any branches that could damage your home or car if they fell, even if the branch is healthy. Use caulk and weather-striping: According to the US Department of Energy, having a drafty house can increase your energy bill by as much as 5% to 30%. Caulk and weather-striping are effective methods to seal leaks. Window frames are a frequent source of drafts, as is anywhere that two materials meet (such as around the chimney, in corners, where pipes exit the house, and around the foundation). You can test for leaks manually, by walking around on a chilly night and feeling where cold air gets in, or using the incense test. The incense test involves turning off any fans, lighting a stick of incense, and running it near potential leaks. If the smoke wavers, there’s a breeze, which means air is getting in and out. (Move flammable objects away from where you’ll be testing. Incense doesn’t typically get too hot, but better safe than sorry.) Prepare to keep out under-door drafts: The space under exterior doors is another major place that drafts can pass through. Make or buy a door snake (or door guard) to keep out the cold. Rolled up towels will do in a pinch, or you can make a cute DIY door snake to help guard your house against the wind. You can also put door snakes on interior doors, if you’re trying to preferentially heat a single room. Improve insulation: Repairing, installing, or improving your house’s insulation can be one of the most effective ways to increase your home’s energy efficiency. Adding insulation is also one of the easiest home improvement projects to do yourself, and it can add value to your home. Insulation is important between walls, in your attic’s floor, and in your basement’s ceiling. You can also install insulation between floors. How much and what type of insulation you’ll need will vary depending on where you live and what part of the house is being insulated (attics need more insulation than walls or floors). The U.S. Department of Energy has a guide outlining the different qualities of insulation needed for different locations and uses. Winterize A/C and water lines: This is a step that will typically require a professional to help with, but even with that cost can save you money in the long run. Talk to neighbors about who they use, or contact your local better business bureau for recommendations. You can also usually purchase a cover for your air conditioner that can help to keep out snow and debris. If you have a window A/C unit, you may want to remove it and put it in storage till the spring. Have a professional check and seal ducts: Your air ducts form a core part of both your central heating and A/C system. Sealing your ducts properly can lead to massive savings in both the winter and summer, since the air will stay cold or hot longer. Properly sealed ducts also reduce incidence of dust and mold in your air. You can hire a professional to come to your house to check and seal your ducts. However, be leery of ‘duct cleaning’ services – most homes don’t need them. Your utility company might offer incentives to improve your ducts. Insulate pipes: Insulating your pipes will help you save on heating water and can reduce the risk of pipes bursting. Most hardware stores sell pre-slit foam that can be easily wrapped around your pipes. Pay attention to the foam’s R-rating. The R-rating is a measure of how effective the insulation is. Most pipe insulation ranges from R-3 to R-7. Higher R-ratings offer better insulation. You can also insulate your hot water heater. Install more efficient doors and windows: Modern, energy-efficient glass can raise the value of your home and help you save on both heating and A/C. Make sure any windows you purchase are Energy Star qualified. You can also install storm windows or a storm door over or behind existing, low-efficiency windows and doors. Storm windows are mostly helpful in areas prone to inclement weather and/or temperatures far below freezing. Buy a window insulation kit: Window insulation kits are a cheaper and easier alternative to installing new windows or storm windows. You can get them for as little as a few dollars. If your area doesn’t get particularly cold in the winter, a window insulation kit might actually be a more cost-effective solution. Larger kits can also be used to insulate sliding glass doors. Replace worn or missing roof shingles: Holes in your roof can let warm air escape and cold water enter, increasing the risk of frost and water damage and increasing your heating bills. If you’re not comfortable repairing the roof yourself, call a professional. Have your chimney inspected and cleaned: A blockage in your chimney could trigger a house fire, or redirect smoke down into your house. Get a certified chimney sweep to check your chimney for problems and remove things like animal nests and built up suit. Chimney sweeps start getting busy in the late fall and winter, so it’s best to get your chimney inspected well ahead of the cold season. Fortunately, you only need to get your chimney checked once a year. Have your furnace inspected: Call an HVAC professional to check your furnace out, to make sure that it’s running efficiently and safely. Damaged or old furnaces can cause massive safety problems, including carbon monoxide buildup, on top of increased energy usage and utility bills. The HVAC professional might also be able to clean and properly adjust your furnace. Many utility companies offer a free annual inspection, and some furnace manufacturers also offer inspections at a discount. HVAC crews get busy once heating season arrives, so a furnace inspection is another thing that it’s best to schedule early. Change out filters: Check your furnace and air filters before heating season starts, and replace them if the filter looks dirty. Standard, disposable filters should be replaced once a month during heating season. Consider installing a permanent filter instead (they’re also called washable or electrostatic filters). Permanent filters are washed instead of replaced, reducing waste. They trap on average over twice as much debris as a disposable filter. A permanent filter should still be washed once a month and allowed to dry before re-installation. Stock up ahead of time: Make certain your snow blower and shovel are in good repair, and replace them before it snows if needed. Also stock up on sand or salt for your driveway, along with non-perishables for your pantry, and any other winter supplies. People often wait until it snows to buy a new shovel, fill their pantry, or refill on propane, risking the stores running out. It’s always a good idea to keep at least three days’ to a week’s worth of non-perishable food, water, medicine, hygiene supplies, and other necessities in your house, in case power gets knocked out and you’re unable to reach the store. During the winter:
Modern Single Family Home In Snow
A few steps should be taken once the cold weather really sets in, to help keep costs down and keep your home warm and cozy.
Check smoke and CO detectors: Ideally, you should check your smoke and carbon monoxide detectors once a week. Find out what type of batteries they need, and make sure to keep a supply on hand so you can change out any depleted batteries. The winter sees an uptick in house fires and cases of carbon monoxide poisoning, so exercise extra caution about both. Run ceiling fans in reverse: Running the fan during the winter sounds counterintuitive, but it can actually be a big help. During the summer most people set their fans to run in a counterclockwise direction so that air is blown down. But in the winter, it’s recommended that you run your ceiling fans on a low speed in a clockwise direction so that air is drawn upward. This will gently pull air upward, forcing the warmer air on the ceiling back down and balancing a room’s overall temperature. Make use of natural light and heat: Although the sun’s effects will be less noticeable in the winter, it can still have a warming impact on your home if used effectively. If you can, keep curtains on south-facing windows open during the day to let the sunlight in. Close curtains at night to help keep heat from leeching back out the windows after the sun goes down. Turn down the thermostat: Especially if you’re not going to be home, consider cranking the thermostat to a lower setting. (You can buy a smart or programmable thermostat if you want the house to be warmed back up before you arrive, but not be wasting heating while you’re away.) Even a few degrees’ difference can result in fairly good savings on heating. Dress warmly: You know how your parents were always saying “If you’re cold, put on a sweater”? Once you are the one paying the bills, you’ll probably appreciate their wisdom a little more. A warm sweater and slippers can go a long way towards staying comfortable in the winter. Keep gutters clean: Clean gutters allow water to flow freely, reducing the chance that water will freeze in the gutters. Clogged gutters, on the other hand, worsen problems with icicles and run the risk of being damaged by the ice.
Q: Help! I woke after last night’s storm to find a discoloration on the kitchen ceiling and a puddle beneath. What do I do about this new leak?
A: There’s nothing quite like an indoor puddle to put a damper on your rise-and-shine routine, is there? The first thing to do is mitigate any moisture damage. That can get complicated, since a leaky roof doesn’t always appear as a puddle on the floor (or at least not immediately). Occasionally, the only sign of a leak is that subtle discolored patch on your ceiling or wall, caused from water pooling behind it. When you’re lucky enough to spot it early on, intervene as soon as possible following these steps.
Secure the scene. If water has only dripped onto the floor, consider yourself lucky and move a bucket to catch the falling droplets. (While you’re at it, save your sanity by propping up some scrap wood inside the container to mute the annoying drip-drip-drip sound.) Otherwise, move as much out of the water’s path and cover items that are too heavy to relocate with thick plastic sheeting.
Photo: istockphoto.com
Drain the water. Using a ladder or a sturdy chair, climb up and puncture the water-damaged patch with a screwdriver. Making a hole might sound counterintuitive, but skipping this step will allow more moisture to seep in. The weight of the water might even cause your ceiling to sag or collapse—one more thing to add to your list of necessary repairs. Ultimately, patching up a small, 1/2-inch drainage hole is a lot easier and cheaper than dealing with structural damage.
Start sleuthing. So where’s the source of that pesky leak? Water travels down trusses or flashing until it finds a weak spot, so the entry point into the house isn’t necessarily directly underneath the part of the roof you’ll have to fix. If you have attic access, head up there first during daylight hours. Turn off the lights and look up for any small opening that allows sunshine to stream through—an obvious source for your leaky roof.
Fight water with water. Can’t spot any signs of damage from the attic? Your next step is the water-test method, where someone stands outside on the roof and, using a lengthy hose, showers the roof until the drip returns—giving you a second chance to locate the source.
Phone a professional. Sometimes, finding what is in need of repair is not as easy as spotting a hole in your attic’s ceiling. From failing flashing to clogged gutters to crumbling shingles, the list of potential causes is very long. If you’ve conducted a thorough inspection and you’re still not certain what has led to your leaky roof, it’s time to call in a pro to both deduce the problem and recommend a fix. The actual repair will depend on many factors, including shingle type and pitch.
Meanwhile, lay out a tarp. When you’ve determined the source of the leak but can’t get a same-day repair, you’ll have to find temporary measures to protect your roof and home from snow, rain, and more water damage. If the roof is dry enough for you to carefully climb, try covering the affected area with heavy plastic sheeting or a tarp (at least 6 millimeters thick) and some 2×4s. Start at least 4 feet beneath the problem area and slowly roll the plastic over it, past the the ridge of the roof, and 4 feet down the opposite side to cover your leaky roof completely. Place one 2×4 at the “top” of the tarp (the opposite side of roof) and one at the bottom to weight it down, folding the tarp back over each plank and fastening it to the wood with a staple gun. The bottom board should rest in an eave or flat area against the roof. Lay a third 2×4 on the top board (which is wrapped in plastic sheeting) and secure it to the wrapped board with nails to help anchor the covering. Use more 2×4s resting on the plastic’s perimeter if you’re worried about wind.
While you work outside, remember: Proceed carefully and—unless you want to compound the problem with a few more leaks—do not puncture your roof by nailing or screwing boards directly to it.
So, you’ve just moved into your brand new home. You shopped around and did a lot of research to find the home that was just right for you. You signed a big pile of documents at closing, the moving trucks have left, all the boxes are unpacked, and all your belongings are in their proper places. What should you do now?
1. Change your filters
One of the most important things to remember is that you are responsible for certain routine maintenance items to keep your house functioning properly. These tasks tend to be relatively simple. For instance, many types of heating and air conditioning systems contain filters to remove dirt and dust from the air. A homeowner should change these filters when necessary.
Cleanliness is a factor that will make your home last longer and work better. Dust and dirt, if allowed to accumulate, can harm the finishes on blinds, cabinets, countertops, floors, sinks, tubs, toilets, walls, tiles and other items. If dirt does accumulate, make sure to clean it with a substance that does not scratch or damage the finishes.
3. Check your exterior
On the outside of your home, make sure that gutters and downspouts do not get clogged with leaves or other objects. The exterior of your house is built to withstand exposure to the elements, but a periodic cleaningwill improve the appearance and, in many instances, prolong the life of siding and other exterior products.
When you bought your home, you probably received a warranty from the builder on workmanship and materials. This warranty applies to problems related to the construction of the home, but it does not apply to problems that arise because of failure to perform routine maintenance. For example, if your roof begins to leak after six months because of faulty workmanship, your warranty would cover that. If you develop a problem because water backed up in clogged gutters that you should have cleaned, the builder is not responsible for repairs. Also, some items, such as appliances, may be covered by manufacturers warranties and are not the responsibility of the builder.
You should fully familiarize yourself with the terms of your warranty soon after you move into your home. With all the excitement surrounding a move into a new home, most people have little desire to curl up in front of the fireplace and read a legal document. Nonetheless, you should not wait to read your warranty until a problem arises. Set aside an hour to learn what your rights and responsibilities are from the outset.
With summer just around the corner, now’s the perfect time to start preparing your new home for the warmer months.
From saving money on your electric bills to giving your home’s interior a seasonal refresh, a lot can be done now to make sure your new home is in optimal shape for years to come. To help get you started, here are just a few summer home maintenance tips from the professionals:
Exterior
One of the best ways to shave the dollars off your electricity bill is to provide natural shade around your home. This can be accomplished with a quick trip to your local garden center.
Planting a well-developed bush near the living room window or a large tree near a second-story bedroom could help keep your home cool and save you money in the long run. Be sure to plant any shrubs, trees and other plants at the appropriate distance from your home to prevent any problems with your foundation and plants’ roots in the future.
While you’re in the gardening spirit, now’s also a great time to think about how you plan to maintain your lawn over the summer. The National Association of Landscape Professionals (NALP) provides several tips in their seasonal guide to summer lawn and landscaping care.
For instance, many people believe hot weather means you should water more frequently, but the NALP actually advises to water your plants less often but more deeply. So increasing the length of time you expose your greenery to water will usually do the trick.
And to ensure the health of your grass, the NALP suggests having your lawn properly aerated to improve the flow of oxygen in addition to adding adequate amounts of fertilizer and frequently checking its pH levels.
For more tips on summer lawn maintenance, check out the full guide.
After your yard is in tip-top shape, it’s time to pay attention to the rest of your outdoor area. Summer nights are great for enjoying friends and family in the backyard, so why not make an outdoor oasis?
“Create areas around your yard that aren’t being used,” suggests Nicolle Nelson, a spokesman for Nadeau Furniture in Dallas, Texas. “And don’t be afraid to use furniture in a non-traditional way.”
For example, adding a fire pit and seating area can help prevent mosquitoes and create an intimate gathering area. Teak benches around the pool and buffets to house your grilling essentials are other great furniture pieces that really bring out the summer feel.
“By adding a piece of furniture to any corner of your patio or yard, you are inviting your family to use every inch of your space,” says Nelson. “That means more memories for your summer.”
Interior
Apart from the exterior of your home, there are also plenty of things you can do to get your home summer ready from the inside.
Since warmer weather brings thoughts of a well air-conditioned home, let’s start with the AC system.
“With spring allergies in full swing and warmer temperatures on their way, it’s crucial to be sure your air filter and AC system are working properly,” says Mike Clear, vice president of operations for American Home Shield, a home warranty company based in Memphis, Tenn.
Clear suggests checking filters regularly throughout the year to help prevent damage, inefficiencies and to keep air clean.
“Schedule annual maintenance on your AC now so you can be sure your unit is in top shape before being put to the test with summer’s high temperatures,” he adds.
He also advises to check in on the furnace and heating system while you’re at it. While a new home’s furnace is likely already quite clean, it’s important to make sure the area around air returns stays clean and unobstructed throughout the year to prevent fire hazards and inefficiency.
Your cooling and heating system is one of the biggest energy users in your home. Here are some inexpensive tips on ways to help save some energy and money this summer.
Summer officially starts on June 20th, but you don’t have to sweat spending extra money on your utility bill this year. There are easy things you can do at home to save. According to the Department of Energy, cooling and heating accounts for about 48% of the energy used in most homes. [1] Here are tips that can help you save energy and money.
Use Fans. Ceiling fans and table top fans can create a wind chill effect, which can help you feel cool. Remember: fans cool people and not rooms. Turn fans on when you enter the room and you will feel cool without having to lower the temperature of your thermostat. Turn fans off when you leave the room to conserve energy. Bathroom fans and range hoods in the kitchen can also help remove heat and humidity from the air.
Insulation. If your home is not properly insulated you can lose the cool air you pay for to the outside. Simple caulking and weather stripping is an inexpensive way to help keep the cool inside and help save energy.
Window coverings / passive cooling. Close blinds and curtains when you can to help deflect heat away from your windows. Your air conditioner will not have to work as hard to cool your home.
Cook outside. Try not to use appliances, like ovens and ranges, which create extra heat inside. Consider grilling outside for dinner so the air conditioner is not working to overcome the heat you are creating in the kitchen.
Regular maintenance of your cooling system is also important during the summer. A trusted technician can insure your air conditioning is operating at peak performance and spot potential trouble before it becomes a larger expense.
As people age, their movement can become less fluid and they may need day-to-day assistance or ongoing health care. The Americans with Disabilities Act of 1990 ensures there are public accommodations available for those who need it. However, commercial spaces are not the only place to find ADA-compliantrooms; many residential homes are remodeling to include fixtures and appliances to accommodate those with disabilities, injuries or other health issues that may make it difficult for them to move around or grip objects.
Research by the American Association of Retired Persons shows that nearly 90% of seniors want to stay in their own homes as they age, often referred to as “aging in place.” With falls as the leading cause of injury-related visits to the emergency room in the United States and the primary cause of accidental deaths (75%) in people over 65, reports MetLife Mature Marketing Institute, it is important that safety is highlighted in the aging-in-place movement.
This movement has affected many areas of the home. The Centers for Disease Control says bathrooms are commonly believed to be a particularly hazardous location. An ADA-compliant shower system allows for a safer showering experience. The technology used with ADA showers is not only geared toward safety but ease-of-use and accessibility as well.
“For showers, it’s preferable to have a zero threshold/walk-in shower area, with height-adjustable hand-held products or multiple showerheads,” says Darnell Wesson, product manager, Bradley Corp. “Activation devices and handles that are easy to see and use also are important. All activations must offer the ability to be turned on with less than five pounds of pressure as required by the ADA. To help prevent slips and falls, grab bars and built-in seats/benches are also key, as well as slip-resistant flooring.”
The design of these ADA-compliant shower systems used to be industrial-looking. However, as these systems move toward residential housing, many manufacturers have started universal design lines, which are age-friendly and blend well with any interior design plan.
Universal design elements
Several products speak to universal design — catering to users on both sides of the fence. “These universal lines are not only for those with disabilities that the ADA regulations accommodate but also for those who are aging-in-place and may have arthritis, for example,” says Jason McNeely, sales training manager with Hansgrohe North America. “We try to be adaptive to everyone and everything is labeled for intuitive use.”
For Wesson, the ultimate design goal starts with an emphasis on user-friendly products with a great aesthetic and are easy to maintain.
“Products must be easy to grip or grasp, easy to understand and operate and, when possible, they should include fail-safe features,” he says. “Subtle integration of safety and support are also critical. The United States is on track to have more than 80 million Americans over the age of 65 by 2050, so manufacturers need to provide innovative, accessible and high-quality products to meet the requirements of the marketplace going forward.”
Another universal design concept is temperature-control technology. “An integrated digital temperature display with LED color indicators signals different water temperature ranges, providing users peace of mind before getting in the shower or bath,” says Sarah Reep, director of designer relations and education at Masco Cabinetry, parent company ofDelta Faucet Co., and a National Association of Home Builders’ certified aging-in-place specialist.
“The technology is available on a variety of hand showers and showerheads to suit various décor styles.”
The trend is to improve the function of bathroom products yet allow consumers to use them with less effort, she adds, such as hand showers with rubberized grips or the implementation of push-button technology. “Regardless of the consumers’ ability, accessible shower systems with advanced technology can help all comfortably interact with water,” Reep says.
McNeely agrees: “Push-button technology is an evolutionary change. We saw the change from the rotary phone to the push-button model; even cars are changing to push-button engine starts. Society is demanding the making of easier and more functional products.”
Touchless technology — which solves flexibility issues for people who have hand injuries or arthritis — also is an ongoing trend.
“Touchless fittings controlled by infrared electronics combine ease-of-use with reliable operation,” says Cheryl Dickson, head of brand and trade marketing for Grohe America. “Showers need to be convenient and electronic functionality makes operation effortless and exact. Functions that control temperature, as well as configurations that make showering while seated possible and comfortable, also are popular. Technology that controls water flow, water source and especially temperature are very important now and will continue to be in the future.”
Code considerations
U.S. Attorney General Eric Holder signed final regulations in July 2010 revising the Department of Justice’s ADA regulations, including its ADA Standards for Accessible Design. Shower system regulations are covered in sections 607 through 610 here: http://tinyurl.com/ADA-regs-2010.
“Building codes can vary regionally and locally; however, design and planning keys for bathroom accessibility are consistent across North America,” Reep notes. “Dimensional relationships and access are two critical pieces. One such example might be accommodating a 5-ft. open radius within the bath space so a wheelchair can turn fully in the room. If room size limitations hamper this, layout options exist to make the space flexible for added functionality.”
Height is another area to watch for ease-of-reach issues so that people can easily access lavatory sinks, countertop surfaces, grab bars, seating and shower entry thresholds.
Specifications to keep in mind when remodeling bathrooms for accessibility include:
The faucet controls and shower diverter can be turned on and off easily, and are operable and usable with one hand — without tight grasping, pinching or twisting of the wrist;
An adjustable-height, hand-held wand with at least a 60-in. long hose provided so persons who bathe from a seated position may wash and rinse with the directional spray;
Roll-in showers should have a securely fastened folding seat at 17-in. to 19-in. above the floor to make it easy for people who use wheelchairs to transfer into the shower space;
The faucet controls and wand are positioned on the wall along the side of the seat so they are operable from the folding seat or from the wheelchair;
A horizontal grab bar on the wall alongside and/or opposite the shower seat (but not behind the seat) for stabilization and aid in transfer from a wheelchair to the folding seat; and
The gap between the wall and the inside face of each grab bar should be 1 1/2-in. to accommodate persons with disabilities who rest their forearms on the bars for stabilization. This ensures the arm does not accidentally pass between the grab bar and wall, especially if a fall occurs.
For manufacturers, product testing is a very important process in ensuring the longevity of their products and the safety of their customers. “At our life-testing laboratories, our products are put through their paces and shown no mercy,” Dickson says. “Here, our faucets, showers, thermostats and all the components that go with them have to endure the simulated effects of 20 years’ daily use — with especially hard water. People who find conventional fittings hard to handle expect good design to make operation easier.”
However, it all comes down to the shower experience, so performance testing is critical for these shower systems. “We want to make sure people are still having a great shower experience,” McNeely notes. “Not only are these systems becoming more popular, but they are becoming more of a standard — not so much asked for as much as expected as second nature. It is becoming more of a normalized design.”
Reep agrees that universal design is gaining industry momentum, commercially and in private residences. “Many new construction projects are working to create spaces that are as inclusive as possible, thus making the need for accessible bathroom and shower products even greater than before,” she says.
UL Warns of Potential Hazards from Improper Installation of Lighting Retrofit Kits
UL has issued a warning over the growing number of reports of improperly installed and uncertified retrofit lighting kits that may pose a fire or shock hazard.
In many states, utility companies are offering financial incentives to consumers and businesses that upgrade or retrofit their facilities to use more energy-efficient lighting. While the move to more modern and efficient lighting fixtures is a positive step, care must be taken to use certified retrofit kits and install them properly. A qualified electrician must complete the retrofit according to accompanying installation instructions, as improper installation may pose a fire or shock hazard.
“Many of these retrofit installations are completed in ways that create safety hazards where none existed before, creating unintended consequences in the name of energy efficiency,” said Marguerite Carroll, manager of UL’s Regulatory Services Department.
The components used in the retrofit may have individual certifications, but if the kit (including the accompanying installation instructions) is not certified per the applicable Standards for Safety, problems can occur.
“The common thinking is that LED retrofits are low-voltage. This is not true. All retrofit kits will include branch circuit connections, and should be treated with proper safety precautions,” said Bahram Barzideh, principal engineer with UL’s Lighting Division. “A retrofit kit is more than just parts. When a luminaire is modified using off-the-shelf parts, there is no way to know if the luminaire is compliant or even safe.”
UL urges those installing a lighting retrofit to use only third-party certified retrofit kits and follow the accompanying installation instructions. UL Certified lighting retrofit kits can be verified in UL’s Certification database found on ul.com at http://iq.ul.com/ssl/and selecting LED Retrofit Kits from the product category pull-down. More detailed information about retrofits and retrofit safety can be found at http://industries.ul.com/lighting/retrofit-kits.
IICRC Certified Firms have earned the right to display the IICRC logo as a symbol of quality. In order to achieve IICRC-certified status, firms must meet a rigorous list of standards in business ethics and expertise. All IICRC Certified Firms must:
Present accurate information to consumers and conduct business with honesty and integrity.
Require a technician on all jobs who has been formally trained and passed all required tests.
Require a continuing education program to keep technicians up-to-date on the latest changes in the industry.
Maintain liability insurance to protect all parties in the event of an accident.
Maintain a written complaint policy and agree to Better Business Bureau or similar arbitration to resolve disputes, and accept the conclusions and recommendations of arbitration.
The IICRC actively has relationships with fiber producers, carpet and fabric mills, furnishing manufacturers and retailers, and others affiliated with the industry. The use of IICRC service professionals is specified in leading manufacturers’ maintenance brochures and warranties.
When it comes to cleaning, restoration and inspection, the IICRC writes the books
As an ANSI-accredited Standards Developing Organization (SDO), the IICRC has led the way in establishing the main industry standards and reference guides for professional carpet cleaning, upholstery and fabric cleaning, water damage restoration and mold remediation.
Each IICRC standard takes years to develop and the coordination of several experts in the field, including allied tradespersons; manufacturers; international, national and regional trade associations; individual or franchise professionals; cleaning, inspection and restoration industry organizations; insurance industry; training schools; contractors; and public health professionals.
These standards are reviewed and updated at least every five years. Many of these fields, such as the water damage restoration field, change rapidly and those who are certified keep up with the advancement of the science and generally accepted practices of the industry.
The IICRC helps keep homes and businesses healthful
According to the Environmental Protection Agency, the average person spends 90 percent or more of their time indoors, where levels of pollutants may be two to five times (and occasionally more than 100 times) higher than outdoor levels.
This makes it extremely important to perform regular maintenance inside your home or business. In addition to vacuuming, cleaning and checking for water damage on a regular basis, using a certified technician for cleaning will help extend the life of your flooring and upholstery and ensure that your home or business is healthful for those who live and work there.
5 Ways to Transform Your Home Into A Stress-Reducing Paradise
People long to be at home as revealed in the well-known saying, "home is where the heart is." Your home is the person or place you love the most.
But if your home design stresses you out, then you may need to control some of the stress-inducing circumstances that are controlling your environment. Why not create a homey paradise right in your own home? As you read on, think how these five ways can help you transform your blab stressful home environment into a paradise that you wake up to each day.
De-clutter your spaces
To ensure that you aren't getting stressed trying to find things on a daily basis, start getting a hold of the clutter in your house by starting small in one specific area. In fact, go through stuff you haven't worn or used in years. Why are you still hanging on to these things? As revealed in this article, the "why" part behind the purpose for decluttering is especially important otherwise the need to declutter will feel like another "cleaning" type task.
Another way to view decluttering is to make space for things such as having a place for each item you need to find. This will ensure that you won't lose your sanity each time you are trying to find something. You can solve this problem by stocking up on plastic containers of all sizes that can hold a variety of papers and items far away from view.
Clean the air in your environment
Purifiers can eliminate toxins from the air. Our homes are full of toxins especially from household chemicals. Getting a high quality air filter either for heating or air-conditioning can also help build your toxic tolerance.
Keep a plant supply
Studies have actually shown that stocking your home with plants can reduce stress. If you don't have time to take care of plants, invest in a few low-maintenance plants like succulents. Balance a succulent plant with other colors, patterns and textures. Like air-filters, plants clean the air and get rid of toxins.
Establish routines and places that give you peace
Where in your home can you feel more at peace? Is there a place you can meditate, relax and breathe? You don't need to go on lavish vacations to find that sense of peace and happiness. For example, is there a meditation corner you can establish in your bedroom?
Light up your life
Lighting, in all forms, can often be harsh and too bright. The key is to aim for warmer and more soothing light that bathes you which is generally produced by halogen bulbs.
Obviously, natural light is the best earth centering energy, but this is not always possible especially if your windows face away from sunlight. LEDs are efficient bulbs that produce more light than the amount of energy they take.
Cleaning and decluttering aren't just "cleaning" mechanisms, but they have the power to transform your life allowing you to feel true joy and happiness in your home. Destressing a home environment is all about connecting to those "feel good" energies.
This Old House host Kevin O'Connor and Jim Cantore of The Weather Channel discuss how to prepare for the next big storm
THIS OLD HOUSE HOST KEVIN O'CONNOR AND JIM CANTORE OF THE WEATHER CHANNELTHIS OLD HOUSE TELEVISION
Overview
Comments
In this video, This Old House host Kevin O'Connor and Jim Cantore of The Weather Channel discuss how to prepare for the next big storm.
Steps: 1. Keep a water supply of one gallon per day per person for three days. 2. Have a three-day supply of canned goods, and don't forget to pack a can opener. 3. Pack several fresh batteries, flashlights, and lanterns. 4. Get a hand-crank flashlight that can also recharge cell phones. 5. Place important documents and phone numbers in a waterproof case. 6. Choose a meeting place in case family members get separated. 7. Portable gas-powered generators must be placed outdoors; never run one in an enclosed space. Be sure to have gasoline on hand. 8. Use a chain and padlock to secure the generator to a tree or other unmovable object.
3 Common Furnace Repairs That Annual Maintenance May Prevent
Nothing is quite as comforting as coming home to a warm house on a cold wintry day. Yet, chances are, you don’t think about your furnace unless it stops working. By then, however, you may be dealing with costly repairs that could have been avoided or minimized. Scheduling annual maintenance for your heating system is a simple step that saves money and time, and minimizes inconvenience and discomfort.
As with any appliance that has multiple moving parts, your furnace is at risk for wear and tear. When these parts become damaged they can make your furnace less efficient or stop working altogether. Here are three common problem areas that your HVAC professional can identify before they become serious:
The Fan
The fan keeps warm air circulating throughout your home and has several components that require attention and maintenance.
Dry ball bearings can cause friction in the fan shaft.
Fan blades can become loose or bent.
Motor mounts can come loose.
Fan belts wear out.
Fan motor issues and electrical issues, including frayed wiring, affect performance, efficiency and safety.
The Burner
During routine maintenance the burner is inspected and cleaned to insure that it is functioning properly. Dust and dirt covering the burner components can prevent all the burners from lighting and can also cause excessive wear and tear. This can result in uneven heating.
The Ignition
Today’s furnaces typically work with an electronic ignition. There are two types: intermittent and hot surface. Dirt and grime that build up over time negatively affect the performance of both types. The intermittent pilot uses a fuel nozzle that can become clogged, blocking the gas from flowing. The dirt on the hot surface igniter can act as insulation, and prevent the igniter from becoming hot enough to light the gas jet. During a maintenance visit, the HVAC professional will clean the igniter components to help prevent these issues.
An annual maintenance inspection is a worthwhile investment. While there are things you can do yourself to keep your furnace running smoothly such as replacing your furnace filters regularly,HVAC professionals are trained to spot potential problems that you likely won’t see.
February may be a shorter month than the others but it’s still a great time of year to get your home projects done. In fact, there are many projects that are perfect to do during the winter month of February. Despite snow or icy weather, balcony garden or backyard gardening is something to think about this month. You may not be able to dig in the dirt, but most regions host their annual home and garden shows now for the spring. (Read how to make the most of attending a show like this.) It’s also a great time of year to purchase seeds and supplies for your summer vegetable or fruit containers.
Inside the home you may be craving some change that is more in line with the upcoming season. Try a new color of paint for your walls or purchase new bed linens for a quick update. Budget friendly projects like spray painting tired old frames is another great way to insert a new interior design scheme without spending a lot of money. Organization is also a great project to focus on this month. Be realistic and start with one room or area at a time. When you reorganize you may find the need to do some minor repair work, so call in a handyman or contractor to fix up that area once and for all.
Here are some other great projects to get done this month.
Treat your loved ones on Valentine’s Day. You don’t have to buy the standard box of chocolate or make expensive dinner reservations. Try giving your loved ones the gift of a healthy and safe home. Here are some great ideas to try this year.
Perform a monthly smoke alarm test. Holding down the button tests the actual sound, but a more accurate test is to mimic the alarm’s ability to detect smoke. Read more about smoke alarms.
Deep clean appliances. This is a great month to do some quick appliance maintenance like:
Washing machine: Clean rubber gaskets and seals with plain vinegar on a cloth. Do a clothes-free cycle with hot water, vinegar and baking soda. Leave washing machine door open for it to dry completely. Check connection points behind the machine to ensure the hoses are in good shape.
Dishwasher: Use plain vinegar on a dry cloth and wipe the edges of the machine that tend to stay dirty. Remove the filter and clean it to remove stuck on food. Sprinkle the inside with baking soda until you’re ready for your next load.
Refrigerator: Remove food and wipe down all surfaces with a mixture of warm water and vinegar. This is a great time to throw out old leftovers and check the expiration dates of condiments. The freezer can also get a quick clean. Use a vacuum to suck up small objects like coffee grounds. Empty ice bins and add a fresh box of baking soda to remove odors.
Trevor Krueger, owner of custom home builders Krueger Group, uses insulation in new homes with higher R-values than required under the current building code because it can better protect plumbing pipes from freezing. He allows extra space between the exterior wall and pipes to allow for more insulation.
January and February are widely considered in the plumbing industry to be the prime pipe-freezing months, a plight that can create huge problems and rack up costly repair bills.
“We have that period where it never gets above 20 degrees during the day,” said Gary Roseberry of Roseberry Plumbing & Heating.
“The problem is that not enough people understand their homes. If your thermostat is at 50 degrees, that’s not necessarily the temperature that’s reaching your pipes.”
Run water, keep cabinet doors open, crank the thermostat and don’t neglect the heat tape is the usual advice, but those in the plumbing industry see enough repeated mistakes each year to know the tips bear repeating.
“Some of the dumb mistakes I’ve seen every year: ‘Oh, it’s hot outside and sunny,’ so they leave the garage door open,” Roseberry said. “But if you leave the cabinet doors open for air circulation and turn the heat up, a lot of the times, plumbing will thaw itself out and they’re fine.”
For owners of older homes dealing with the insulation they’ve got, Roseberry said the usual tricks are typically effective but not always.
Depending on how long someone leaves the faucet running, the water could freeze the sewer line, he said. Heat tapes, which are heating cables that plug into a socket and then are wrapped around plumbing, can be effective, but homeowners often forget to plug them in come fall – or they neglect to notice the tape no longer works, until the pipes freeze.
And frozen pipe problems aren’t limited to indoors; underground pipes can also freeze.
Master plumber Howard Kuhfal of Master Rooter, who averages about 20 frozen pipe calls a week in January and February, said sewer lines are susceptible to freezing, particularly where the pipe has a flat spot.
If a homeowner’s underground pipes tend to freeze, he advises hiring a plumber who can use a camera to identify the trouble spots underground.
“If the sewer lines are under three feet deep, the water in that belly of the pipe will freeze,” he said. “If you have a problem with a sewer line freezing, and this happens every year, hire a plumber with a camera to come in there and locate the area with the flat spot that freezes.”
Frost depth in La Plata County is about three feet underground, Kuhfal estimated, and it’s deeper in areas such as Vallecito and Purgatory. Water lines in La Plata County, at minimum, should be at least 40 inches deep or deeper, he said.
Local builders working on new homes have the option to take some preemptive measures against pipe freezing, from the types of pipe they use to the amount of insulation.
Kuhfal has been in the business 30 years and advises builders to use cross-link polyethylene (PEX) pipe for plumbing.
“PEX pipe has been around La Plata County for several years,” Kuhfal said. “It freezes, contracts and goes back to its original shape. Copper will swell up and split. Plastic will freeze up and shatter.”
Homebuilders are also adding and improving insulation in newer homes.
Trevor Krueger of Krueger Group, which manages the construction of custom homes, said his company uses simple practices that make all the difference in preventing pipe breaks.
For one, he installs plumbing valves when possible in interior walls, which are better insulated.
“When pipes freeze in older homes, that’s just from not having enough insulation,” Krueger said. Insulation is measured by an R-value, which quantifies a material’s thermal resistance. The higher the R-value, the better the insulation. The R-value standard under the city’s building code is R-19, but Krueger builds starting at R-22. In ceilings, the code is R-28, but he builds at R-45.
Other homebuilders are also using spray foam insulation, which is applied as a liquid, then expands as it turns to a solid and offers a higher R-value per inch. “Those things don’t sound like a big difference, but it definitely is a better insulated wall,” Krueger said.
Clogged Filter Monitor Indicates Time To Replace HVAC Filters
AUSTIN, Texas — Airflow1 has announced a clogged filter monitor, called the CFM-GM, that signals the ideal time to replace HVAC air filters, which the company says can help homeowners keep a cleaner indoor environment, reduce the need for maintenance on HVAC equipment, and trim energy costs. The company currently has a Kickstarter campaign to fund the final development and production of the device.
Airflow1 notes that replacing HVAC air filters is necessary to keep equipment running at optimal efficiency, but knowing exactly when to replace them is equally important. Unfortunately, there has never been an easy or precise way to address that question. Filters become more efficient the longer they’re in place, so replacing one too soon is wasteful. But there comes a point when a filter is no longer performing at all, and the HVAC unit suffers a drop in efficiency, not to mention the accumulation of dust and dirt on the components and in the indoor environment. By some estimates, inefficient HVAC units waste up to a billion dollars in electricity each month.
Seeing this problem and finding there was no straightforward way to check for clogged air filters, engineer and product developer Mike Sweaton set out to design a solution that could adapt to most standard HVAC units. “My goals were to develop a product that was easy to install and see, cost effective for homeowners, and most of all, accurate. The reality is that many people change their filters on a set schedule, but that may not be ideal from a cost and resource-use perspective. Once in full production, I believe the CFM-GM will make a tremendous difference in our nation’s energy usage.”
The CFM-GM is said to allow homeowners to find the “sweet spot” — the moment just before a filter clogs and loses its efficiency. The device works by sensing the differential air pressure between the front and the back of the filter. Sweaton said he conducted rigorous testing and research to identify the most robust, accurate, and reliable pressure sensors.
The CFM-GM is designed to work with 1-inch width filters mounted in a wall or ceiling return grille. The device is also compatible with Supermechanical’s Twine, a wireless home monitoring system.
Preparing Your Home for Winter; 8 Fall Maintenance Hacks for Cold-Weather Comfort
We all look forward to fall’s festivities. But taking the time to prepare your home for winter (before it arrives) can help ensure you’re cozying up by the fireside — worry-free — once cold weather rolls around. Find out how with these 8 simple hacks.
Ahhh, fall is finally here! The leaves are changing, there’s a crisp coolness in the air, and our favorite pumpkin-flavored treats line store shelves once more. Decorating and meal-prepping might be the first things on your mind when it comes to preparing your home for the colder months — but the National Weather Service is predicting strong winter storms that could affect homeowners across the country this year.
Here are 8 important fall maintenance tips that can make all the difference once winter’s first freeze hits.
1. Clear out your gutters
All those colorful leaves falling from the trees sure are pretty — but they also pile up pretty quickly in your home’s gutters.
Excess debris can lead to clogs (or ice dams in wintery conditions), which can prevent gutters from draining properly. In turn, there’s a chance water could seep into your home since it has nowhere else to escape to, causing a multitude of issues like damage to your valuables, mold growth, and even structural rot.
Before winter hits, clear your house’s gutters of leaves and any other debris that might’ve accumulated during the summer months. It also helps to run water through the gutters afterward to check for any leaks or misalignments that could damage your home.
Things like damaged weather stripping and small cracks in your home’s structure allow warm air to escape, causing your heater to go into overdrive to keep your place warm.
The solution to your chilly house and high utility bills is pretty simple: before it gets wintery outside, inspect your home’s windows, doorways, and any other places where air might be able to enter or exit.
You can use caulking to stop leaks in the stationary components of your home (like a crack in your doorframe) and weather stripping to insulate the moving components (like windows and doors).
Home just doesn’t feel like home if a malfunctioning heater is leaving you with the chills. And in parts of the country with freezing temps, it can be a much more serious situation.
That’s why it’s wise to have a licensed contractor come out to inspect your heater at least once a year, especially before the weather outside becomes frightful.
4. Prepare your pipes
Get to know where the pipelines in your house are located and make sure to inspect them every autumn (at least).
Simply patch any small leaks with heat tape to help reduce weaknesses that might cause the pipe to burst in freezing weather. And you can further protect any exposed outdoor pipes by insulating them with foam or rubber pipe wraps, which can be found at your local hardware store.
For larger leaks or pipeline problems, it’s always a good idea to play it safe and call the pros.
5. Drain any outside faucets and irrigation systems
Speaking of bursting pipes, it’s important to pay attention to the water systems immediately outside your place too. Undrained water in outdoor faucets and irrigation systems can expand when frozen and cause a pipe to burst.
Draining faucets is simple enough: just pack away your garden hoses in the garage for the winter and let out any remaining water — easy as that!
Irrigation systems, on the other hand, often vary in the way they should be maintained. It’s best to call a professional who has experience with underground water systems, just to cover all your bases.
6. Have your roof inspected
For your safety, a full-blown roof inspection should be done professionally. The cost to hire an inspector can be as low as a little over $200 and can prevent seriously hefty repair expenses down the line if a winter storm wreaks havoc on your roof and you don’t have sufficient insurance coverage to cover repair costs.
Reinforcing your roof now can help you avoid a whole host of hazards, like air and water leaks, water damage, mold, and more — all of which could put a damper on your seasonal festivities (and your wallet).
7. Restock cold-weather home essentials
Key items like rock salt or kitty litter, snow shovels, space heaters, extra batteries, and heated blankets can help make your home both more functional and comfortable during wintertime. Stock up on these helpful winter wares ahead of time to help avoid any extra hassle or stress come holiday season.
Believe it or not, your homeowners policy could come to the rescue for a whole host of cold-weather mishaps.
Whether a hailstorm leaves holes in your roof, a vandal breaks into your home and destroys valuables while you’re out holiday shopping, or the weight of snow and ice results in structural damage to your house,homeowners insurance could help pay to repair or replace your loss
Before you know it, winter will be here! If you live in Colorado, you know that the weather can turn from warm and moderate to cold and snowy almost overnight. Typically, there is a spell of cold weather in October or November, followed by a warming trend for a few weeks, and then winter hits altogether. The problem with the short spell of cold weather that typically hits during October or November is that it causes homeowners to rush to turn on their heat before their HVAC system has been tuned up for the cold season.
Now is a good time of year to call your furnace repair company to schedule your annual tune-up and maintenance. But besides scheduling your appointment, make sure to follow these seven steps which will make sure your furnace is ready to heat your home this winter:
Change your air filter. During your annual furnace tune-up appointment, your furnace repair technician may replace your air filter with a new one. However, this is a task that you can complete on your own before your appointment if you think you will run your furnace before your scheduled furnace tune-up.
Review the settings on your thermostat. You might not have looked at the winter settings on your thermostat for six months. Make sure to check that the settings are correct and make any necessary adjustments. If you have a programmable thermostat and you are unsure how to set it correctly, your furnace repair company should be able to assist you.
Make sure all air vents are open. An HVAC system functions the best when the flow of air throughout your home is unobstructed. Therefore, make sure all air vents are open and that return air registers are not blocked by furniture or other items such as pictures or mirrors hanging on the wall.
Clean the area around your furnace. If your home is set up like many, your furnace probably sits in a basement, a closet or a room that gets very little use. It’s likely that dust and debris gathered around the furnace over the course of many months. Make sure to sweep or vacuum the area that surrounds your furnace so the dust and debris is not pulled into the system when it runs.
Check your carbon monoxide detectors and smoke alarms. A home’s carbon monoxide detectors and smoke alarms should be checked on a regular basis. It’s a good idea to make a habit of checking to make sure these safety items work well at the beginning of each and every season.
Have your air ducts cleaned. Many people have their air ducts cleaned on an annual basis. If you want to make sure the dust, debris and pollutants are removed from your air vents before you turn on your furnace for the season, now is a good time to schedule your appointment.
Turn on your furnace and make sure it works. The best way to know if your furnace is set for cold weather is to test it. Wait for a cool day and turn on the system. Make sure it heats your home to the temperature you desire.
As of its 8 a.m. update, the National Hurricane Center has upgraded Joaquin to a category 1 Hurricane. Estimated sustained winds are at 75.
Hurricane warnings have been posted for part of the Bahamas. No watches or warnings have been issued for the U.S. yet.
The latest official track looks pretty ominous for the Garden State, with most of the state back in that “cone of uncertainty”. Remember, the white markers on the following graphic indicate the most likely position of the center of the storm by early Monday morning – they do not give any information regarding the size or extent of the storm.
8 a.m. update on Hurricane Joaquin from the National Hurricane Center
Forecast Track
Confidence is growing that we are going to see some really messy weather from Joaquin through early next week. Here’s the latest spaghetti plot, showing Joaquin’s expected track according to 32 different forecast models…
Spaghetti plot of forecast track models for Joaquin, as of 2 a.m. on September 9/30. (TropicalTidbits.com)
Blur your eyes a little while staring at that jumbled mess, and you will see the vast majority of these models eventually turn Joaquin toward the United States. The general consensus seems to be toward a landfall south of New Jersey, somewhere between the Delmarva and the Carolinas. As I mentioned yesterday, it really doesn’t matter where along the coast the storm eventually makes landfall – any of these solutions would include some degree of weather and/or surf problems for New Jersey.
However… the landfalling hurricane solution is still not a 100% sure bet… The spaghetti plot above indicates a number of outliers that turn Joaquin eastward toward the middle of the Atlantic Ocean. That also includes the almighty European model, which rapidly sweeps Joaquin out to sea, before the east coast even sees a drop of rain from the storm. That alone is enough fodder to keep some doubts and some hesitation in today’s forecast. Until and unless the Euro model flips to match the others, it is difficult to offer a high confidence forecast.
Forecast Intensity
Observations via satellite and hurricane hunters have so far painted Joaquin as a stronger storm than models have indicated. Now, the vast majority of forecast models showed Joaquin will become a category 1 hurricane Wednesday (which it did), and potentially strengthening to a category 2 hurricane by Thursday afternoon.
Graph of forecasted intensity for Joaquin, as of 2 a.m. on September 9/30. (TropicalTidbits.com)
The rapid decrease in intensity after the 96-hour mark (early Sunday morning) is expected as Joaquin potentially comes close to U.S. Cooler water and friction will cause the storm to lose some oomph as the storm approaches landfall.
Worst Case Scenario for New Jersey
Yesterday, I presented three potential scenarios for the track of Joaquin. I highly recommend you refresh your memory as to these options before reading further.
The best case scenario for New Jersey at this point would still be if the storm take the “out to sea” track, according to the Euro model among others. We would still potentially see some tropically induced heavy rain, and some rough surf… while the wind and flooding would be marginal at best.
Tropical IR satellite image of Joaquin, from the morning of September 30, 2015. (College of DuPage Meteorology)
Meanwhile, the current most likely scenario is pretty close to the worst case scenario. Following a landfall somewhere between Delaware and South Carolina, Joaquin would track up the coast. We would still have the torrential rain threat – upwards of 5 to 8 inches (or more). We would still have the wind threat – with 50+ mph gusts (I’ve seen as high as an 80 mph gust on one model this morning). And depending how close the storm gets to the Jersey Shore, we could still have the storm surge and coastal flooding threat- 3+ foot surge would cause significant coastal erosion.
A lot of New Jerseyans have been asking about how the impacts of Joaquin will play out late this week through the weekend. Here is my attempt at a timeline. This is frankly an educated guess at the forecast. Please keep in mind, this forecast is really volatile, and is very much subject to change…
Wednesday 9/30: Overnight steady rain has ended, but scattered showers remain possible through lunchtime. Otherwise, cloudy and breezy (20 mph).Thursday 10/1: Overcast skies, a few showers, and a brisk northerly wind (25 mph) will keep us cool in the lower 60s. Still no Joaquin impacts. Friday 10/2: An ejection of convection way ahead of Joaquin could bring us a round of heavy rain and gusty winds. Saturday 10/3: Actually looks pretty tranquil – a few showers will be possible, and wind gusts over 40 mph will be possible. Sunday 10/4: Joaquin makes landfall just south of New Jersey. Heavy rain and very strong wind gusts (50+ mph) enter the region. Rough surf and the potential for 3+ foot storm surge begin.
Monday 10/5: Potential tropical storm effects continue, with rain eventual tapering off from south to north
Tuesday 10/6: Storm wraps up with a few leftover showers, a stiff breeze (20 mph), and seasonably cool temperatures.
A Final Note on Uncertainty
This has been one of the most complicated storm forecasts in recent memory, given the wide variety of model tracks and the inconsistency of each model from run to run. While there remain some question marks regarding this storm’s precise track and timing, we are becoming more comfortable and more confident that the impacts on New Jersey and the entire eastern seaboard will be significant. That would be even more true if the European model resolved to match most of the other storm track solutions.
Is this storm going to be as bad as Sandy? Highly doubtful. Sandy was a one-of-a-kind storm that made direct landfall in New Jersey, and came from a completely different direction.
Is this storm still worth watching for New Jerseyans? Absolutely. No matter where you live in New Jersey, your plans for this weekend through early next week are in jeopardy. It’s time to start thinking about contingencies, and whether you have enough food and other supplies to last through the weekend.
You don’t have to be a Game of Thrones fan to know that winters these days are wild. When colder months roll around, the only thing that’s certain is that the weather will be unpredictable. Whether it’s ice storms across the North East, or flash floods throughout the South West, being prepared is the best defense.
Check these nine home projects to weatherproof your place and make sure you have a cozy winter.
Get a winter-ready roof. A leaking roof makes for a messy, expensive, winter. Inside the house, dark ceiling stains or sagging spots mean a roof repair is in order. Outside, confirm shingles have no signs of splitting, disintegration, or looseness. If your roof is tricky to access—or you have tile shingles—hire a specialist to do the inspection. It’s not worth the broken bones or broken tiles!
Clean those gutters. You could break out the ladders and gloves, root around in old wet leaves… or do yourself a favor and hire someone who specializes in gutters to handle this arduous task for you. A professional will safely reach the roof, clear out the muck, and look for signs of wear and tear that might need repair.
Tuck up your trees. If winter storms are bad, unwieldy trees can do serious damage to homes, vehicles—even people. Call in a tree trimming service to give an assessment of your yard and tree safety. Southeastern cities such as Miami,Houston, and New Orleans benefit from trim trees during hurricane season as well.
Tune up your heat source – and save money on heating bills. Have a fireplace or heater? Get it ready for winter. Buildup in a fireplace is a serious fire hazard. Call in an expert to take care of black dust or residue. For heaters, call for a routine maintenance check before the freezing temps hit.
Winterize your windows and doors. Apply weather stripping around doors to seal in heat and keep out cold. Use caulk to seal windows in tight and keep out icy winds. Even cities with moderate winter climates like Los Angeles benefit from these quick fixes. Best of all, it’s a cheap energy saver!
Schedule your holiday lighting installation. Winter prep is not all chores! Decorating is a fabulous project to look forward to. Think big this year with a gorgeous light display that’ll have all the neighbors jealous. Give Chicago’s Magnificent Mile Lights Festival a run for their money.
Winterize the yard. Bring in small plants that can’t survive a freeze like the ones that strike Dallas each winter. For cities that deep freeze, like Chicago and Boston, turn off outdoor watering systems to avoid bursting pipes. Regardless of location, every yard benefits when you load up the truck—or hire someone to do the dirty work for you—and haul away dead bushes, old leaves, and yard waste. When rotting debris stays on the lawn all winter, expect brown spots and blight come spring.
Prep the pool. Love the summertime fun of playing in the pool? Make sure it gets the winterizing treatment before snows and freezing temperatures hit. Cities like Newark that enjoy both hot and cold temperatures can call in a pool specialist or winterize themselves to make sure the pool survives the winter.
Finish your to-do list. Getting winter ready is a great excuse to fix a leaky faucet, repair the creaking washing machine, and replace the springs on the garage door. Everything is more manageable when the weather is warmer. Either get out the toolbox or hire a handyperson—all you’ll have to worry about when the temperature drops is which movie to watch.
The current El Nino weather pattern may be on track to become one of the strongest in more than half a century, experts at the World Meteorological Organization said Tuesday.
The El Nino event involves a shift in winds in the Pacific Ocean along the equator every few years, warming the water more than usual and triggering a change in global weather patterns.
The Geneva-based U.N. body says ocean and atmospheric conditions over the tropical Pacific and most expert models and opinion point to a strengthening of the El Nino in the second half of 2015. This El Nino, the first since 1997-98, follows the rapid melting of arctic sea ice and snow cover in the northern hemisphere over the last few years.
Weather Whys: An Autumn forecast based on the LRC & El NinoKJRH - Tulsa, OK
"This is a new planet. Will the two patterns reinforce each other or cancel each other?" said David Carlson, director of WMO's World Climate Research program. "We have no precedent for this situation."
A WMO statement Tuesday said models indicate ocean temperatures in the east-central tropical Pacific are likely to reach peaks that could make this El Nino among the four strongest since 1950. Peak strength is expected between October and January.
El Nino's impact this year on California is one lingering question. The coast of California, which has faced four years of drought, would traditionally get a lot of rain from the El Nino weather pattern, officials said.
WMO director of climate prediction Maxx Dilley said farmers, rescue officials and reservoir operators are among those bracing for El Nino's impact.
Safety should always be at the front of our minds on any job – from biohazard cleanup to fire restoration. But the truth is, once our mind is focused on the job at hand, it’s easy to forget simple ways to keep ourselves and our team safe. OSHA, or the Occupational Safety and Health Administration, was established in 1971 to help ensure employees have a workplace free from recognized hazards. While OSHA does help with safety, no one agency can be responsible for the safety of everyone every day. It’s no secret safety issues increase following a fire, flood or other disaster. So it’s up to restoration contractors and technicians to understand the risks and be trained to handle them whether it be high levels of bacteria in a flooded home, or mold on a basement wall. Basic Safety Risks Here are some safety risks to consider specifically related to restoration and remediation work, and very simple safety tips to keep in mind:
Structural integrity issues caused by fire or flood damage -- don’t walk on surfaces that are not stable.
Possible exposures from toxic chemical substances generated during a fire or in flood water -- wear rubber boots and gloves.
A variety of sharp metal objects, razor blades, jagged edges – use care when handling and clean any cuts or wounds.
Breathing dust containing asbestos or other toxic materials – wear proper filtration masks.
Eye injuries from flying debris, dust, contaminated water and cleaning chemicals – wear safety goggles.
Carbon monoxide from propane or gas fired generators or other equipment – do not work in these areas.
Ladders – avoid electrical wires, position at a safe angle; don’t place on unstable surfaces.
Chain saws and other power tools– follow manufacturer’s instructions and don’t overreach.
Trucks or other heavy equipment backing up or being moved – always be alert on the job.
Remediating death scenes (may include blood or bodily fluids) – use gloves and other PPE (personal protection equipment) like hazmat suits.
Beyond PPE’s Now, let’s dive a little deeper. Workers must avoid exposures to microbial contamination and chemicals via skin contact, inhalation, and ingestion. This requires the use of PPE’s and good personal hygiene. Washing hands often and not eating in areas where work is being performed are two simple practices that should not be overlooked. Even with the proper PPE’s, physical and emotional stress can take a toll. Pace yourself and take frequent breaks. Keep a watchful eye on those helping with cleanup and be vigilant of your surroundings. Drink plenty of water in order to stay hydrated. Seek medical attention if your body temperature exceeds 103degrees Fahrenheit, you experience dizziness or nausea or you have other health concerns. Talk to your primary care physician about tetanus or other vaccinations you may need. Handling Chemicals Technicians should also be trained to select and use appropriate cleaning chemicals, disinfectants and protectors. For example, bleach, while readily available and inexpensive, is a caustic and hazardous chemical. It can cause harm to human skin and mucus membranes, is corrosive to metals, is readily inactivated by organic matter, produces irritating fumes, and can generate deadly chlorine gas or form explosive compounds if inadvertently mixed with ammonia or ammonia-containing products. The American Association of Poison Control Centers reported in 2004 that there were over 57,000 exposures, major or minor, reported from bleach across the United States. When using any chemical, care should also be taken to allow adequate dwell time for EPA registered disinfectants. All EPA labeled directions must be followed. Moreover, using a chemical that may be “safer” and less toxic may not be strong enough to inactivate target organisms. There is no doubt the most efficient method to stay safe is to constantly be aware of your work area surroundings and follow OSHA and industry guidelines. Safety is everybody’s job. Additional Resources Going beyond those very basic rules of worksite safety, following industry guidelines such as S500 Standard and Reference Guide for Professional Water Damage Restoration, the S520 Standard and Reference Guide for Professional Mold Remediation, and the NIDR Fire Guidelines, provide additional, more specificknowledge for various restoration and remediation situations. Plus, OSHA, the EPA and organizations like the American Red Crossand FEMA are excellent resources and their websites provide guidance free of charge.


 24/7 Emergency Service
 Wishing you a safe and joyful Thanksgiving,
SERVPRO Team Spinner
(908) 233-7070
Wishing you a safe and joyful Thanksgiving,
SERVPRO Team Spinner
(908) 233-7070

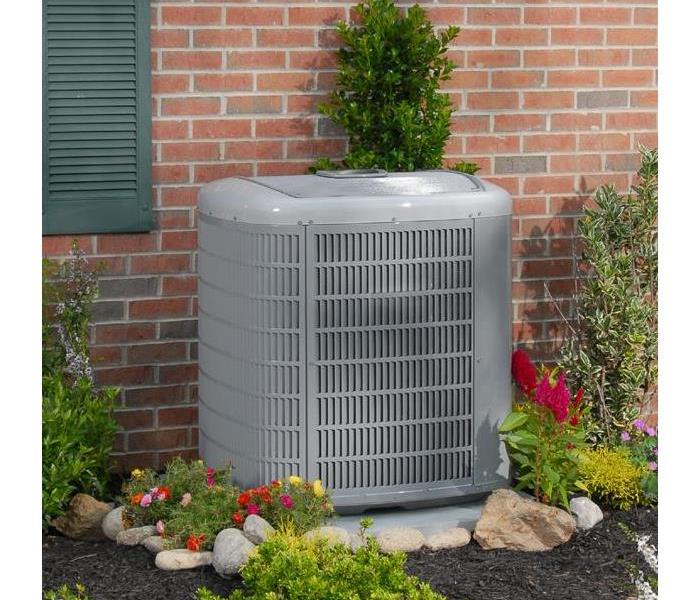

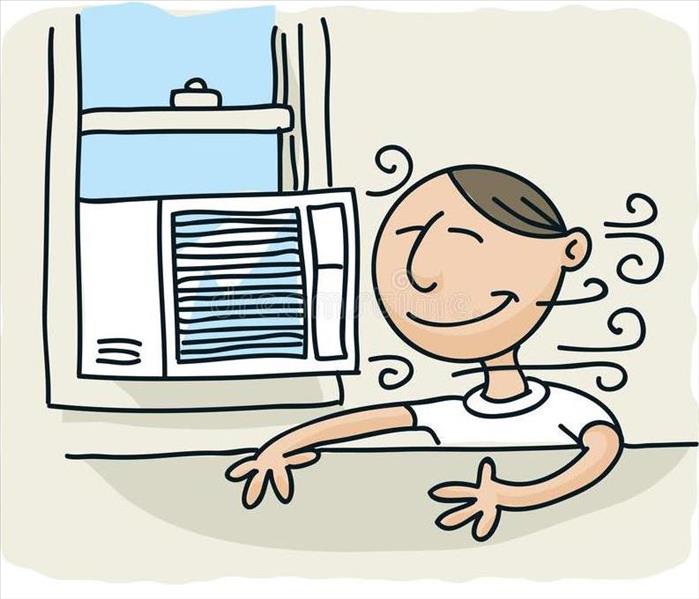
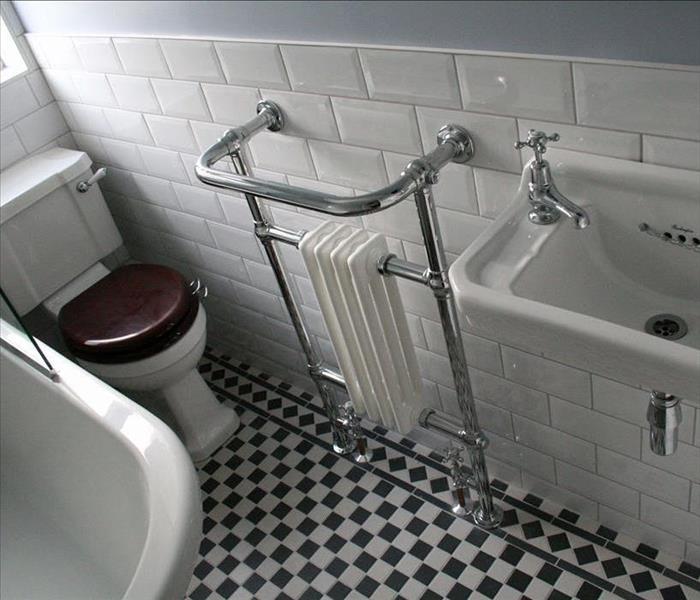


